After this post, you will be able to look up what metal shavings in oil usually indicate, how to tell normal wear from active failure, and what inspection steps make sense before a teardown. This is one of those findings that gets everyone tense in the shop, because the same drain pan can hold harmless fine glitter or the first warning of a wiped bearing. Here's the chemistry, here's the spec, here's what to do with it.
What counts as normal, and what does not
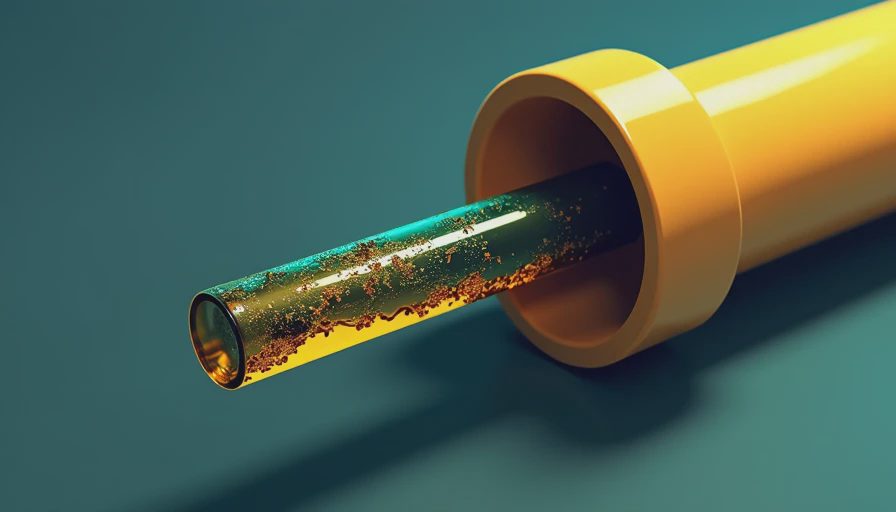
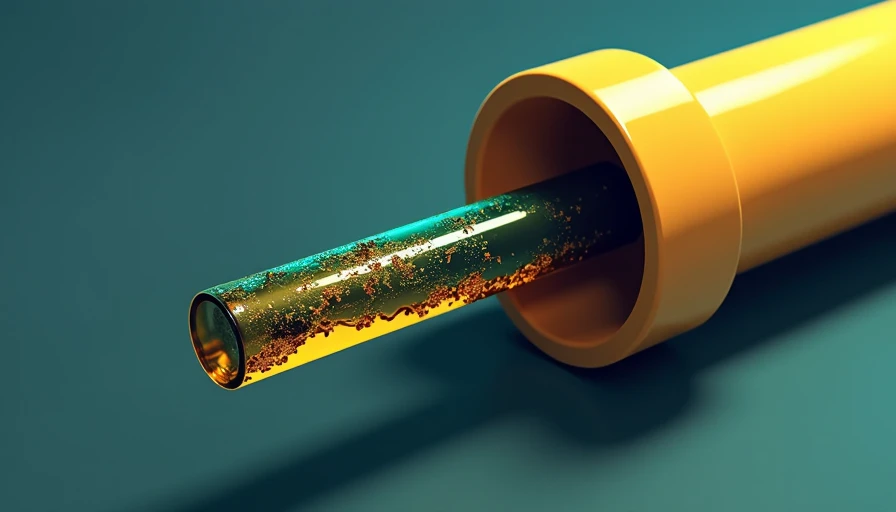
A small amount of metallic material in used oil is not automatically a catastrophe. Every running engine generates wear particles. Rings, cam lobes, bearings, timing components, oil pump gears, and cylinder walls all shed some material over time. Most of the smallest particles stay suspended in the oil until they are trapped by the filter. If you are seeing metal shavings in oil with the naked eye, though, the discussion changes. Visible flakes, chips, or needle-like fragments deserve follow-up.
Reference Box: In oil analysis, wear metals are often tracked in parts per million, but visible debris is beyond what a routine ASTM D5185 elemental report captures well.
The first question is size and appearance. Fine silver-gray dust can be leftover break-in material in a fresh engine or rebuilt assembly. Larger bright flakes suggest active steel or aluminum wear. Copper or bronze tones point your attention toward bushings or bearing overlay. Dark ferrous fuzz stuck to a drain plug magnet often comes from steel components and can be more informative than the oil color itself.
Where the metal usually comes from
When I teach this topic, I tell students to think by metallurgy, not by panic. Ferrous material usually means steel or cast iron parts: crankshaft journals, camshafts, lifters, timing chains, oil pump internals, cylinder liners, and gears. Nonferrous material opens a different list. Aluminum can come from pistons, some housings, or timing covers. Copper-colored material can come from bearing layers, thrust surfaces, or bushings. Lead and tin are often tied to plain bearing construction, though modern bearing metallurgy varies by design.
If your customer asks, the one-line answer is: color, magnetism, and particle shape help narrow the source before disassembly.
On the spec sheet, the number that decides it is often the oil filter's capture efficiency, commonly discussed under ISO 4548-style filter testing for full-flow filters. Very small wear metals may be present without visible debris because the filter is doing its job. Once actual metal shavings in oil show up in the drain stream or filter media, the filter may be overwhelmed, the damage may be recent, or the particle size may simply be too large to stay trapped.
A practical next step is to cut the oil filter open. Spread the pleats, inspect under bright light, and use a magnet on the residue. That one step often tells you more than guessing from the drain pan.
How to inspect before you decide on repair
Start with the basics and stay organized. Capture the drained oil in a clean pan, not one contaminated with brake cleaner residue or old shop debris. Run a magnet through the sample. Strain a portion through a clean lint-free paint filter or coffee filter for a quick look. Then cut the oil filter open with a proper filter cutter so you do not add steel from a hacksaw blade and create a false trail.
Reference Box: ASTM D4177 covers automatic particle counting in liquids, and ISO 4406 is the familiar cleanliness coding approach used more in hydraulics than passenger-car engine diagnosis, but the principle is the same: particle size matters.
Also pay attention to symptoms that travel with metal shavings in oil. Low oil pressure, knocking, new valvetrain noise, misfire, timing correlation faults, or a sudden drop in filter life all strengthen the case for internal damage. If the engine runs quietly, oil pressure is normal, and the debris is extremely fine after a recent rebuild, a controlled recheck interval may be reasonable. If the engine is making noise, do not keep running it just to gather more evidence. More run time can turn a salvageable crankshaft into a full rotating assembly loss.

Break-in debris versus failure debris
This distinction matters. Fresh engines, rebuilt engines, and some newly installed components can shed a measurable amount of fine metallic material during break-in. Plateau-honed cylinders, new rings seating, and fresh cam or timing components can all contribute. That is why many builders perform an early first oil change. But break-in debris should trend down quickly, not increase.
Failure debris behaves differently. It tends to be coarser, more abundant, and often paired with heat, noise, or oil pressure changes. Bearing failure can produce copper, lead, tin, and then steel as layers are breached. Piston scuffing can show aluminum. Timing drive wear can create sharp steel flakes. If metal shavings in oil are increasing between short service intervals, treat that as active damage until proven otherwise.
Reference Box: SAE viscosity grade, such as SAE 5W-30 under SAE J300, tells you flow and high-temperature viscosity range. It does not tell you wear condition by itself.
That point is important because many people try to solve debris with thicker oil alone. Sometimes that masks symptoms briefly, but it does not remove the source of the metal.
What to do next, including safety and disposal
If the debris is light and plausibly tied to break-in, document it, change the oil and filter, and reinspect after a short interval. If the material is obvious, repeated, or accompanied by noise or low pressure, stop operation and move to mechanical inspection. Depending on the engine, that can mean checking the oil pump pickup, pulling valve covers, dropping the oil pan, or inspecting rod and main bearings before a full teardown.
For fleets and serious DIY owners, this is also the point where used oil analysis earns its keep. A lab can trend iron, copper, aluminum, lead, silicon, fuel dilution, viscosity shift, oxidation, and contamination. It will not replace hard inspection, but it can help confirm direction.
Handle the drained oil and filter as used oil waste. Wear nitrile gloves, avoid skin contact, and store used oil in a labeled, closed container. In the U.S., used oil should go to a recycling collection point or service facility that accepts it; do not dump it, burn it casually, or mix it with solvents or coolant. Oil-soaked absorbents and heavily contaminated rags may have separate disposal requirements depending on local rules.
The practical bottom line is simple: metal shavings in oil are a diagnosis clue, not a diagnosis by themselves. Identify the metal, inspect the filter, match the debris to the symptoms, and decide quickly whether you are seeing normal settling-in or a component coming apart.


No comments yet — be the first to share a thought.