After reading this guide, you will be able to identify a coolant leak from water pump components, separate it from a hose or radiator leak, choose the correct replacement fluid, and explain the repair clearly to a customer. I will approach it the way I teach fluids and diagnostics in the shop: here's the chemistry, here's the spec, here's what to do with it.
A water pump circulates coolant through the engine block, cylinder head, radiator, heater core, and sometimes a turbocharger or transmission cooler. When its mechanical seal fails, coolant often escapes through a small drain passage called the weep hole. That opening is intentional. It gives failing seal lubricant and coolant somewhere to go instead of allowing pressure into the bearing cavity.
Recognizing the leak before teardown
A coolant leak from water pump failure often leaves a trail near the pump pulley, drive belt, timing cover, or pump housing. On a transverse four-cylinder engine, the fluid may run down the side of the block and appear to come from a lower hose. On an older rear-wheel-drive vehicle, it may drip directly behind the fan or below the serpentine-belt tensioner.
Look for a damp track, white or colored crust, rusty staining, or a clean circular splash pattern around the pulley. The color is not a reliable chemistry identifier because dye packages, coolant age, lighting, and mixed fluids change what you see. A sweet odor after shutdown is a useful clue, but never taste or deliberately sniff an unknown fluid closely. Ethylene glycol is toxic, and pets are attracted to its sweet taste.
Other symptoms include a low expansion-tank level, repeated need to top off, a chirping or grinding bearing, belt contamination, and temperature movement during idle. A heater that blows cold at low engine speed can indicate low coolant, but it can also result from trapped air or a restricted heater core. An overheating gauge means the vehicle should be shut down safely rather than driven to the parts store.

Confirming a water pump diagnosis
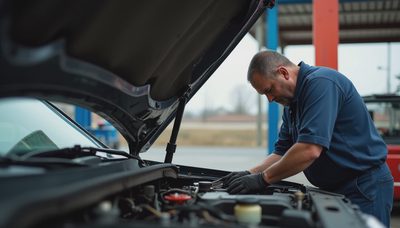
Start with a cold engine. Remove the pressure cap only when the system is fully cool; a hot cooling system can release scalding liquid and vapor. Inspect the pump area with a bright light, then check the belt path and nearby hose connections. A mirror or small inspection camera can reveal a weep-hole trail hidden behind a pulley.
A cooling-system pressure tester is usually the best next step. Install the correct adapter, pump to the pressure listed on the cap or service information, and watch the gauge for several minutes. Do not exceed the component's rated pressure. A steady drop with wetness at the pump supports the diagnosis. If pressure falls but the pump stays dry, inspect the radiator seams, thermostat housing, hose clamps, heater hoses, and plastic fittings.
Do not confuse a water pump leak with condensation from the air-conditioning system. Clear water under the passenger side after using the air conditioner is normal. Coolant generally has color or residue and appears closer to the front of the engine, although vehicle layouts vary. A UV dye approved for cooling systems can help locate a slow leak, but use the correct amount and a compatible lamp; excessive dye does not improve the test.
Reference Box: A pressure test finds the external leak; it does not by itself prove that the pump bearing or seal is the only failed component. Spin and listen to the pulley only with the engine off, and follow the service procedure for belt removal.
Repair choices and what the job includes
A confirmed coolant leak from water pump should not be treated with stop-leak as a routine repair. Sealant products can restrict small passages in a heater core, radiator, or thermostat, and they can complicate later service. The durable fix is normally pump replacement, along with a gasket, O-ring, or sealing compound specified for that engine.
The labor depends heavily on the drive system. An externally mounted serpentine-belt pump may take one to three hours, while a timing-belt-driven pump often requires belt removal and tensioner inspection. On the latter design, replacing an old timing belt during the same job can prevent paying similar labor twice. Parts commonly range from about $50 to $250 for the pump, while total repair invoices can run from roughly $300 to more than $1,500 on difficult applications.
Clean the mating surfaces without gouging aluminum. Use new fasteners if the manufacturer requires them, tighten in the stated sequence, and never substitute ordinary silicone for a specified anaerobic sealant or formed gasket. After filling, bleed air according to the vehicle procedure. An air pocket can cause false overheating, poor cabin heat, or a noisy pump after an otherwise correct installation.
Coolant chemistry and fluid selection
A water pump depends on coolant for more than freeze protection. The fluid carries heat, limits corrosion, lubricates compatible seal materials, and protects aluminum, iron, solder, and elastomers. The inhibitor package is therefore as important as the glycol and water ratio.
Use the vehicle manufacturer's specification rather than choosing by color. Conventional green, extended-life organic-acid formulations, hybrid organic-acid products, and phosphate-free formulas are not interchangeable solely because their colors look similar. Some coolants are sold concentrated and require deionized or distilled water; others are premixed at approximately a 50/50 ratio. Read the label and service information before filling.
Reference Box: The practical one-line rule is to match the OEM coolant specification, concentration, and water quality. Mixing an incompatible package can reduce inhibitor performance and create deposits, even when the engine does not overheat immediately.
If a system was contaminated or filled with an unknown product, drain and flush it according to the service procedure. Collect the old coolant in a clean, labeled container. Do not pour it onto soil, into a storm drain, or down a household sink.
Final inspection and safe handling
After repair, refill slowly, run the engine with the heater on, and monitor the level as air purges. Check for leaks at operating temperature, then inspect again after a complete cool-down. Verify that the belt tracks correctly and that no coolant remains on the belt, pulleys, or electrical connectors. A short road test should be followed by another level and pressure check.
A coolant leak from water pump should be repaired before it becomes a belt failure or overheating event. If coolant reaches the bearing, the pump can become noisy or seize; if the belt drives the timing system, the consequences can include severe engine damage. That is why a small drip deserves a measured diagnosis rather than repeated top-offs.
Wear chemical-resistant gloves and eye protection during draining and flushing. Keep coolant away from children and animals, label the container, and take used fluid to a municipal collection site, repair facility, or recycling program that accepts antifreeze. Never mix it with used engine oil unless the receiving program specifically directs you to do so.
If your customer asks, the one-line answer is simple: a coolant leak from water pump usually points to a failed pump seal, but pressure testing and inspection must confirm the source. Match the fluid to the specification, replace the damaged components, bleed the system, and document the final leak check.

No comments yet — be the first to share a thought.